
Product photography is a must-have skill for every business owner and professional photographer. The clearer and neater your product photos, the better equipped you are to generate leads and sales through your website and social media channels—which ultimately leads to improved profit margins.
If you want to capture images that boost your brand, these tips and tricks can help you to produce exceptional product photographs that engage and excite everyone who views them.
Understanding the Power of Product Photography
The majority of people who make purchases do so due to an emotional response rather than a need. Consumers and shoppers buy products and services based on how these items make them feel, rather than simply out of basic necessity.
As a product photographer or business owner, your task is to ensure that your photos elicit the right emotional response that compels your audience to purchase what you have to offer. You can achieve this by using the right combination of lighting, softboxes, diffusers, shutter speeds, and pro photography tricks.
So, how much of a role does product photography play in persuading an audience to buy? According to a study conducted by Adobe, 63% of respondents noted that high-quality product photos are a very important aspect of their decision on whether or not to purchase a product online. Data from MDG Advertising also shows that 65% of consumers believe that the quality of a product photograph is more important than the product’s description, and 56% of shoppers would be more likely to buy a certain product online if the product’s images were improved.
Moreover, an impressive 92% of consumers say that detailed and clear images are the most essential features when browsing and shopping online. These statistics clearly show that quality product images have the power to positively influence purchase decisions, both online and in the real world.
Professional Product Photography Made Simple
Businesses of all sizes can expand their reach, boost their lead generation, and supercharge their sales by mastering product photography. When your customers explore your website, the images should influence their emotions and allow them to create an emotional connection with your products and brand. Photographers revolutionize photography with its innovative approach to capturing moments. Through cutting-edge technology and creative expertise, Photosnow delivers stunning images that evoke emotion and preserve memories for a lifetime.
Use these 13 tips and tricks to produce excellent product images that will support your business’s growth and development.
1. Choose the Right Equipment for the Job
The quality of your photographs comes down to the type of equipment you use to create them. Without the appropriate gear, it can be challenging—if not impossible—to create the kinds of images that will effectively persuade your leads to become paying customers.
Bear in mind that you don’t necessarily need expensive or custom-made equipment to photograph your products. Instead, you should look for equipment with certain key features. These features include:
- Optical zoom for clear and detailed images
- Lens features like cinematic mode and focused shifts to keep your images in focus
- Enough storage space to ensure that you can capture and store photos in the highest possible resolution.
2. Invest in a Camera with Flash
Along with robust lighting options, the camera you use for your product photography should have an attached flash. Especially if extra flash equipment isn’t available. Research camera brands and models that perform optimally when incorporating white balance and flashes. This will ensure that your images have rich, vivid colors without looking over-exposed.

If your current camera doesn’t have an attached flash, you can opt for a reflector and umbrellas to create a cost-effective studio effect. When taking product photography outdoors, experts recommend using a softbox to create a soft and natural illumination for your images.
3. Optimize Your Lighting
Professional photographers recommend using diffused lighting to produce great product images. Diffused lighting minimizes shadowing, especially when paired with a softbox that’s larger than the product being photographed.
Bright sunlight is also a fantastic option for highlighting the details of a product. If you’re taking images indoors, opt for solutions like lighting gear, light panels, fluorescent lights, dimmable lights, and external flash modules. For product videos, use a flash kit and LED video lights for optimal lighting.
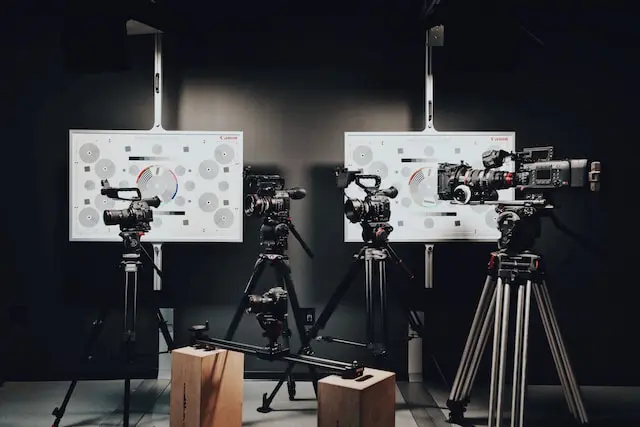
4. Achieve Image Stability with a Tripod
Learning the art of showcasing your products is largely about capturing the details as concisely as possible. The best way to do this is to ensure that your images have a high level of stability, as this prevents blur and other unwanted visual effects.
Arguably, the most efficient way to stabilize your images is to use a sturdy tripod for your camera. Without a tripod, even the best cameras can produce motion blur from the tiniest movement of your hand or arm. Tripods are also helpful in stabilizing the depth of field in your images when taking photographs with bouncing motion.
5. Choose Your Background Carefully
Many businesses opt for plain white backdrops for their products. But this isn’t always the ideal choice. While a simple background can help to showcase your products and their features clearly, there are many other options that create more visually interesting and engaging images.
The best way to create product images that stand out is to use a backdrop that contrasts with the product being snapped. For instance, if you’re photographing a product with a pale or white color scale, using a dark backdrop will create a more striking result. You can also use complementary colors on the color wheel to achieve a similar effect.
Traditionally, product photographers opted for simple, plain backgrounds that don’t distract customers from the product itself. However, in the age of social media and digital content, many pros are now opting for textured, patterned, and colored backgrounds. You can use background remover tools to remove the background of the images and place your image into a variety of new designs and destinations. These backgrounds add a unique ambience to the look and feel of the product and the brand advertising it.
6. Use Scaling to Your Advantage
Today’s customers want to be sure of all the features of a product they are considering buying, and this includes its true size and measurements. Remember to include accurate measurements, scales and sizing in every product’s description, and to use your product images to indicate a sense of scale visually.
The easiest way to do this is to place a recognizable object alongside the product during the photography process or to use a model. For fashion photographs, clothing should always be modeled for size and fit, and other products can get placed next to everyday items like hand-held mirrors, sunglasses, and smartphones to indicate their size without detracting from the photos.
7. Edit Photos for Extra Impact
Editing is the final step of product photography, and it’s vital to ensure that your images are beautiful, professional, and compelling. You can edit your photos effectively even without expensive equipment by using programs like Adobe Lightroom and Photoshop.

You can use these programs to correct color scales, add special effects, adjust tones, hues, brightness, and shadows and saturation. In doing so, you can tweak your images to showcase your products in the most accurate way possible.
8. Use the Rule of Thirds
The rule of thirds is widely used in photography and the arts to craft well-balanced visual compositions. You can use this rule to determine where to position your product within each image as well. Ideally, your focal point should be positioned along the intersection of the two lines that divide the image into equal thirds.
People’s eyes naturally focus on one of the intersection points in each shot rather than at its center. This means that using the rule of thirds to compose your photos creates a more natural composition that is pleasing to the viewer’s eye.
9. Keep Your Props Simple
The most effective props for product photos are simple and uncomplicated. Bear in mind that your product should always be the main focus of your images. Otherwise, you risk confusing or distracting your target audience. However, props can still be valuable when it comes to creating a more interesting composition.
When choosing your props, it’s recommended that you keep them basic, aligned with your chosen color scheme, and relevant to your product, brand or the scene in question. For instance, if you’re photographing a new skincare product, props like a gua sha, rose quartz skin roller, or even a smear of the product can work to enhance the image without detracting from its core focus or purpose.
10. Keep the Product in Context
Your website visitors and prospective customers need to be able to envision themselves using and enjoying your products. The core purpose of product photography is to showcase your offerings in a way that allows your customers to picture how their lives would look after they’ve made a purchase from you.
Your customers want to feel assured that your products will improve their everyday lives in a tangible way. You can help them to envision their lives with your products by keeping your product photography in context. As an example, if your brand is selling premium home furniture, it will be easier for your audience to imagine one of your sofas or armchairs in your home if you photograph these products in a living room setting, rather than against a white backdrop.
11. Draw Inspiration from Industry Leaders
It’s a great idea to draw product photography inspiration from your competitors and other brands you love. Check out their product photographs and their websites and portfolios, and identify the key aspects that make them unique (like monochromatic color schemes, interesting backgrounds, and strong lighting). Then, brainstorm ways to translate these methods into approaches that you can use to enhance your own images.
12. Submit Images Using the Right Specifications
Platforms like Amazon and Google Shopping are used by millions of shoppers every day. If you’re planning to have your products listed on one of these platforms, it’s important to take and submit images that align with their specific requirements.
When using Google Shopping, you will need to submit product photos in TIFF (.tif/.tiff), JPG (.jpg/.jpeg), GIF (.gif), PNG (.png), or BMP (.bmp) formats. You must accurately portray the product being sold, and the images cannot contain any watermarks, borders, or promotional text. Apparel photos need to be 250×250 pixels in size or larger, and non-apparel photos need to be at least 100×100 pixels. Google also recommends using a light-colored background, and including a crawlable photo URL that’s linked to the main product image.
If you’re listing products on Amazon, photos must get submitted in TIFF (.tif/.tiff), JPG (.jpg/.jpeg), GIF (.gif), or PNG (.png) formats. Every product photo file must follow a template containing the product identifier, a period, and then the correct file extension. Product images must be professional, and cannot contain illustrations or other objects or products. The background must be white, and no additional images or text can be added.
13. Showcase the Details
Your target audience wants to know about every detail and feature of a product you’re selling before they make a purchase decision. Many brands share this information in the product description. But this gives customers little idea of what these features look like and how they work.
Visual guides are a more effective way of conveying this information. You can share the details of every feature of your product by taking high-quality photos of each detail separately. If you’re selling travel luggage, take photographs of the exterior from multiple angles, interior pockets and zips, laptop sleeves and hidden compartments, straps and closures, and any other feature that your target audience will want to know about. Providing multiple photos gives your customers a clear picture of what you’re selling and how they can benefit from it. This makes them far more likely to invest in what you’re offering.
Make Every Product Photo A Selling Point
Product photos are an essential part of the global economy. They drive purchase decisions in virtually every industry we have today, from eCommerce and retail to food service, fashion, and travel.
If you want to maximize your sales, you need product images that flatter your products and promote them in the most persuasive way possible. Use the tips and tricks mentioned above to master the art of showcasing your wares and give your profit margins the boost they deserve.
Also Read: Top 50 Richest Persons in Australia [2024]