
Tying a tie might seem like a daunting task, especially if you’re new to the world of formal wear. Whether you’re preparing for a job interview, a wedding, or a special event, knowing how to tie a tie is an essential skill for any well-dressed individual. In this comprehensive guide, we will take you through every step of tying a tie, covering various popular knot styles, tips for choosing the right tie, and common mistakes to avoid. By the end of this guide, you’ll be a tie-tying expert, ready to tackle any formal occasion with confidence.
Understanding the Basics
Types of Ties
Before we dive into the art of tying a tie, it’s crucial to understand the different types of ties available in the market. Common types include:
- Neckties: The standard tie worn for most formal occasions.
- Bow Ties: A classic alternative to neckties, often seen at black-tie events.
- Cravats: A more casual and relaxed neckwear option, usually made of silk or a lightweight fabric.
Parts of a Tie
Every ties consists of essential components, each serving a specific purpose in the tying process:
- Blade: The wider end of the tie.
- Tail: The narrower end of the ties.
- Tip: The pointed end of the blade
- Knot: The area around your neck where the ties are tied.
Choosing the Right Tie
Tie Length and Width
The length and width of a tie play a significant role in achieving a polished look:
- Length: The tip of the ties should ideally touch the top of your belt buckle.
- Width: The width of the ties should complement the width of your lapels. Thin ties (2-2.5 inches) are modern and trendy, while wider ties (3-3.5 inches) offer a more classic look.
Related Post: Fashion Nova For Men: Top 20 Must-Have Trends
Fabric and Patterns
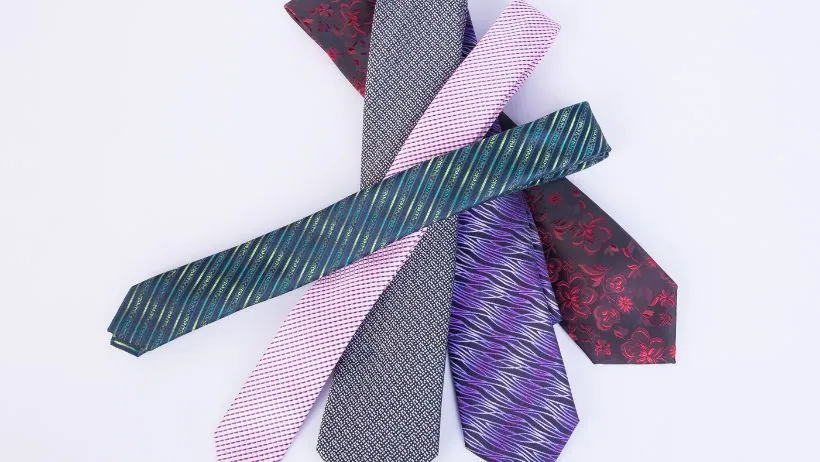
Consider the fabric and pattern of the ties based on the occasion and your outfit:
- Silk: A popular choice for its smooth texture and luxurious appearance.
- Cotton: Ideal for casual and summer events due to its breathable nature.
- Patterns: Choose patterns that contrast with your shirt to create visual interest. Common patterns include stripes, dots, plaids, and solids.
Popular Tie Knots
Four-in-Hand Knot
One of the ways on how to tie a tie. The Four-in-Hand knot is a simple and versatile knot suitable for most occasions:
- Start: Begin with the backside of the ties facing away from you, the wide end is on the right, and the small end is on the left, with the tip of the small end slightly above your belly button.
- Cross: Cross the wide end over the small end.
- Wrap: Wrap the wide end behind the small end from right to left.
- Across: Bring the wide end across the front horizontally from right to left.
- Up: Pass the wide end up behind the knot from underneath.
- Down: Pull down on the wide end to tighten the knot. Slide the knot up to adjust.
Half-Windsor Knot

The Half-Windsor knot offers a slightly more formal and symmetrical look. Follow these steps to ties it:
- Start: Begin with the backside of the ties facing away from you, the wide end is on the right, and the small end is on the left, with the tip of the small end just above your belt line.
- Cross: Cross the wide end over the small end.
- Wrap: Wrap the wide end behind the small end from right to left.
- Across: Bring the wide end across the front horizontally from right to left.
- Up: Pass the wide end up behind the knot from underneath.
- Down: Pull down on the wide end to tighten the knot. Slide the knot up to adjust.
Windsor Knot
The Windsor knot is a wide, triangular knot that projects confidence and authority:
- Start: Begin with the backside of the ties facing away from you, the wide end is on the right, and the small end is on the left, with the tip of the small end just above your belt line.
- Cross: Cross the wide end over the small end.
- Wrap: Wrap the wide end behind the small end from right to left.
- Across: Bring the wide end across the front horizontally from right to left.
- Up: Pass the wide end up behind the knot from underneath.
- Down: Pull down on the wide end to tighten the knot. Slide the knot up to adjust.
- Tuck: Tuck the wide end between the knot and your collar.
Related Post: The Textile Manufacturing Process in India and its demand.
Tips and Tricks
Practice Makes Perfect
Tying a tie is a skill that improves with practice. Take your time, and don’t be discouraged if you don’t get it right on your first attempt.
Pay Attention to Proportions
Consider your body type and the style of your outfit when choosing the knot style. A larger knot like the Windsor might overpower a slim frame, while a smaller knot like the Four-in-Hand can get lost in a broad chest.
Experiment with Knot Styles
Different knots complement various collar styles. For spread collars, opt for wider knots like the Windsor, while narrower collars pair well with smaller knots like the Four-in-Hand.
Invest in Quality Ties
Quality ties not only look better but also knot more easily and last longer. Invest in ties made from silk, wool, or high-quality microfiber for a polished appearance.
Master the Dimple
A tie dimple, a small indentation just below the knot, adds a touch of sophistication to your look. To create a dimple, pinch the fabric while tightening the knot.
Common Mistakes to Avoid
Incorrect Length
Ensure the ties is the correct length, with the tip resting near your belt buckle. A tie that’s too short or too long can disrupt the overall look.
Sloppy Knots
A poorly tied knot can make even the most expensive ties look shabby. Take your time to tighten the knot properly and adjust it until it looks neat and symmetrical.
Ignoring Collar Style
Different collar styles require different knot styles. Pay attention to your shirt’s collar and choose a knot that complements its shape and spread.
Stains and Wrinkles
Always check your ties for stains and wrinkles before wearing it. Stains can ruin the fabric, and wrinkles can make the ties look untidy.
Conclusion
Mastering the art of tying a tie is a valuable skill that enhances your overall appearance and boosts your confidence in formal settings. By understanding the basics, choosing the right ties, practicing various knot styles, and avoiding common mistakes, you can tie with ease and elegance. Remember, like any other skill, patience and practice are key to achieving a perfect knot every time. So, go ahead, experiment with different knots, and embrace the world of dapper dressing with your newfound tie-tying expertise.
Also Read: Top 50 Wedding Dress for Men: Suit, Sherwani, Kurta
1 Comment